
You can make a real-estate video from the listing photos you already have. Select views that explain the property, put them in a useful order, add verified facts, assemble or generate the video, then review the finished file before publishing.
A photo to video maker handles presentation; you still decide what the buyer should see and whether it accurately represents the home. This guide uses VideoTour.ai’s workflow, published by VideoTour.ai. The existing demonstrations below show what to inspect. If you are still choosing software, compare video apps for realtors.
A photo to video maker handles presentation; you still decide what the buyer should see and whether it accurately represents the home. This guide uses VideoTour.ai’s workflow, published by VideoTour.ai. The existing demonstrations below show what to inspect. If you are still choosing software, compare video apps for realtors.
Summary
Create an AI Video Tours from PhotosTry it For Free
See a photo become a scene—and watch a complete tour
Start with this published exterior photo and its matching motion clip. We chose this pair for the comparison because the roofline, windows and driveway give you clear reference points as the view moves. Compare those details throughout playback rather than judging only the opening frame.
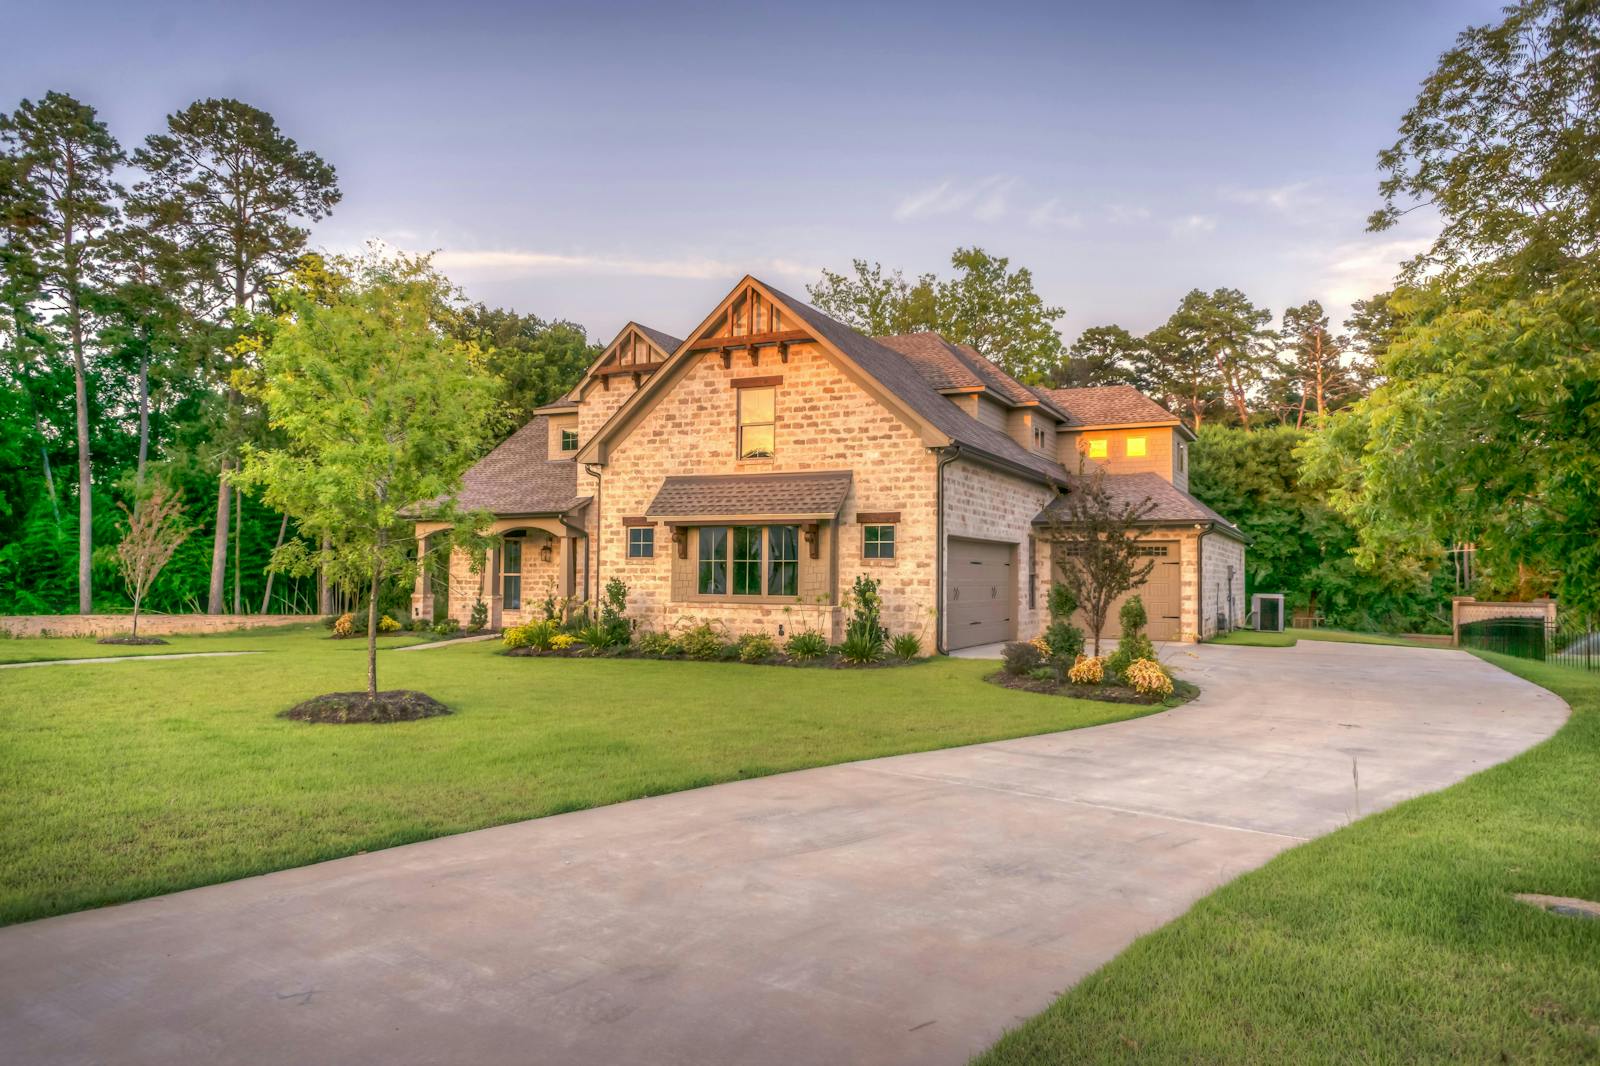
Source: the exterior photo already published in VideoTour.ai’s before-and-after demonstration.
Watch the matching exterior motion clip (MP4)
Matching exterior motion demonstration; one published source photo and a roughly three-second clip, 1152 × 768 pixels. The movement is generated, not filmed.
A complete video adds sequencing, captions and a soundtrack. Play this separate, existing product demonstration to see those elements together:
Watch the complete-tour demonstration (MP4)
Separate complete-tour demonstration, 16:9, 960 × 540 pixels, about 1 minute 45 seconds. It is a different property from the photo-and-clip pair above. Its on-screen listing details are demonstration content, not a current listing offer.
Watch how long each view stays on screen and where text sits over the rooms. Use that as a review exercise for your own project. The examples illustrate presentation; they do not establish the facts or layout of your listing.
Source: the exterior photo already published in VideoTour.ai’s before-and-after demonstration.
Watch the matching exterior motion clip (MP4)
Matching exterior motion demonstration; one published source photo and a roughly three-second clip, 1152 × 768 pixels. The movement is generated, not filmed.
A complete video adds sequencing, captions and a soundtrack. Play this separate, existing product demonstration to see those elements together:
Watch the complete-tour demonstration (MP4)
Separate complete-tour demonstration, 16:9, 960 × 540 pixels, about 1 minute 45 seconds. It is a different property from the photo-and-clip pair above. Its on-screen listing details are demonstration content, not a current listing offer.
Watch how long each view stays on screen and where text sits over the rooms. Use that as a review exercise for your own project. The examples illustrate presentation; they do not establish the facts or layout of your listing.
Choose photos that explain the property
Choose each image for the information it adds. A clear overall view of the main living area usually explains more than several similar angles of the same sofa. Include the rooms, exterior and distinctive features relevant to this listing, using photographs you have permission to publish.
Compare competing views before uploading. If two kitchen photos show the same cabinets, keep the one that makes the room easier to understand. Keep both only when the second reveals something useful, such as an adjoining dining area. Leave out an unrelated agency logo, a blurred duplicate or a decorative close-up that adds no property information. These are selection criteria, not a record of edits made to the demonstrations above.
These published sample photos illustrate selection decisions. They are not a source pack for the complete-tour video above.
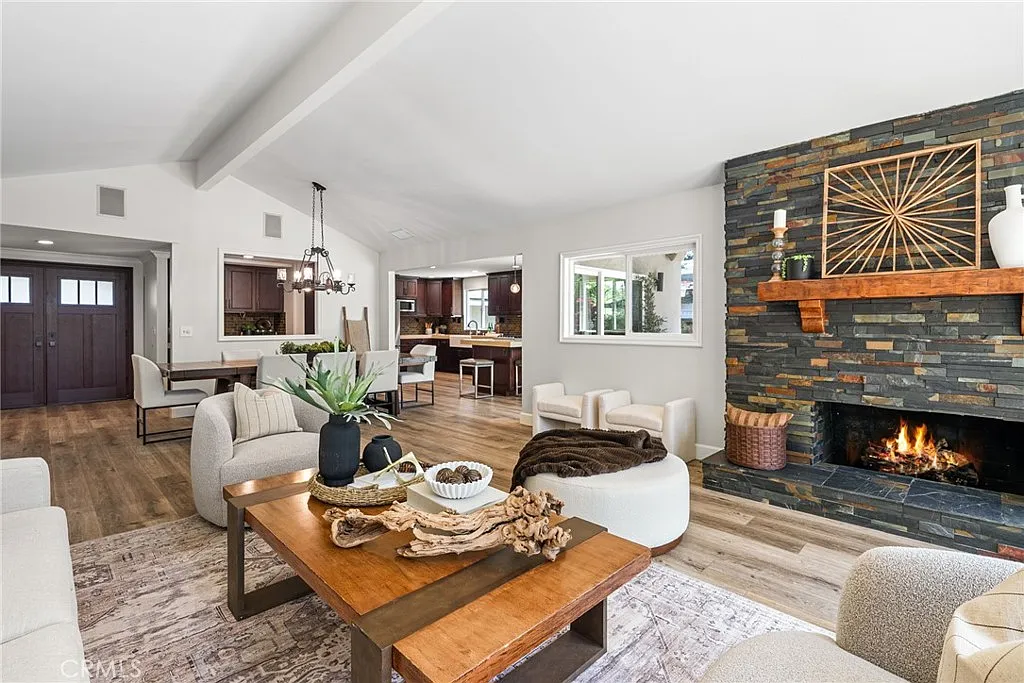
The wider living-room view shows seating, the fireplace and other visible areas in one frame. Choose a view like this when its job is to explain the room as a whole.
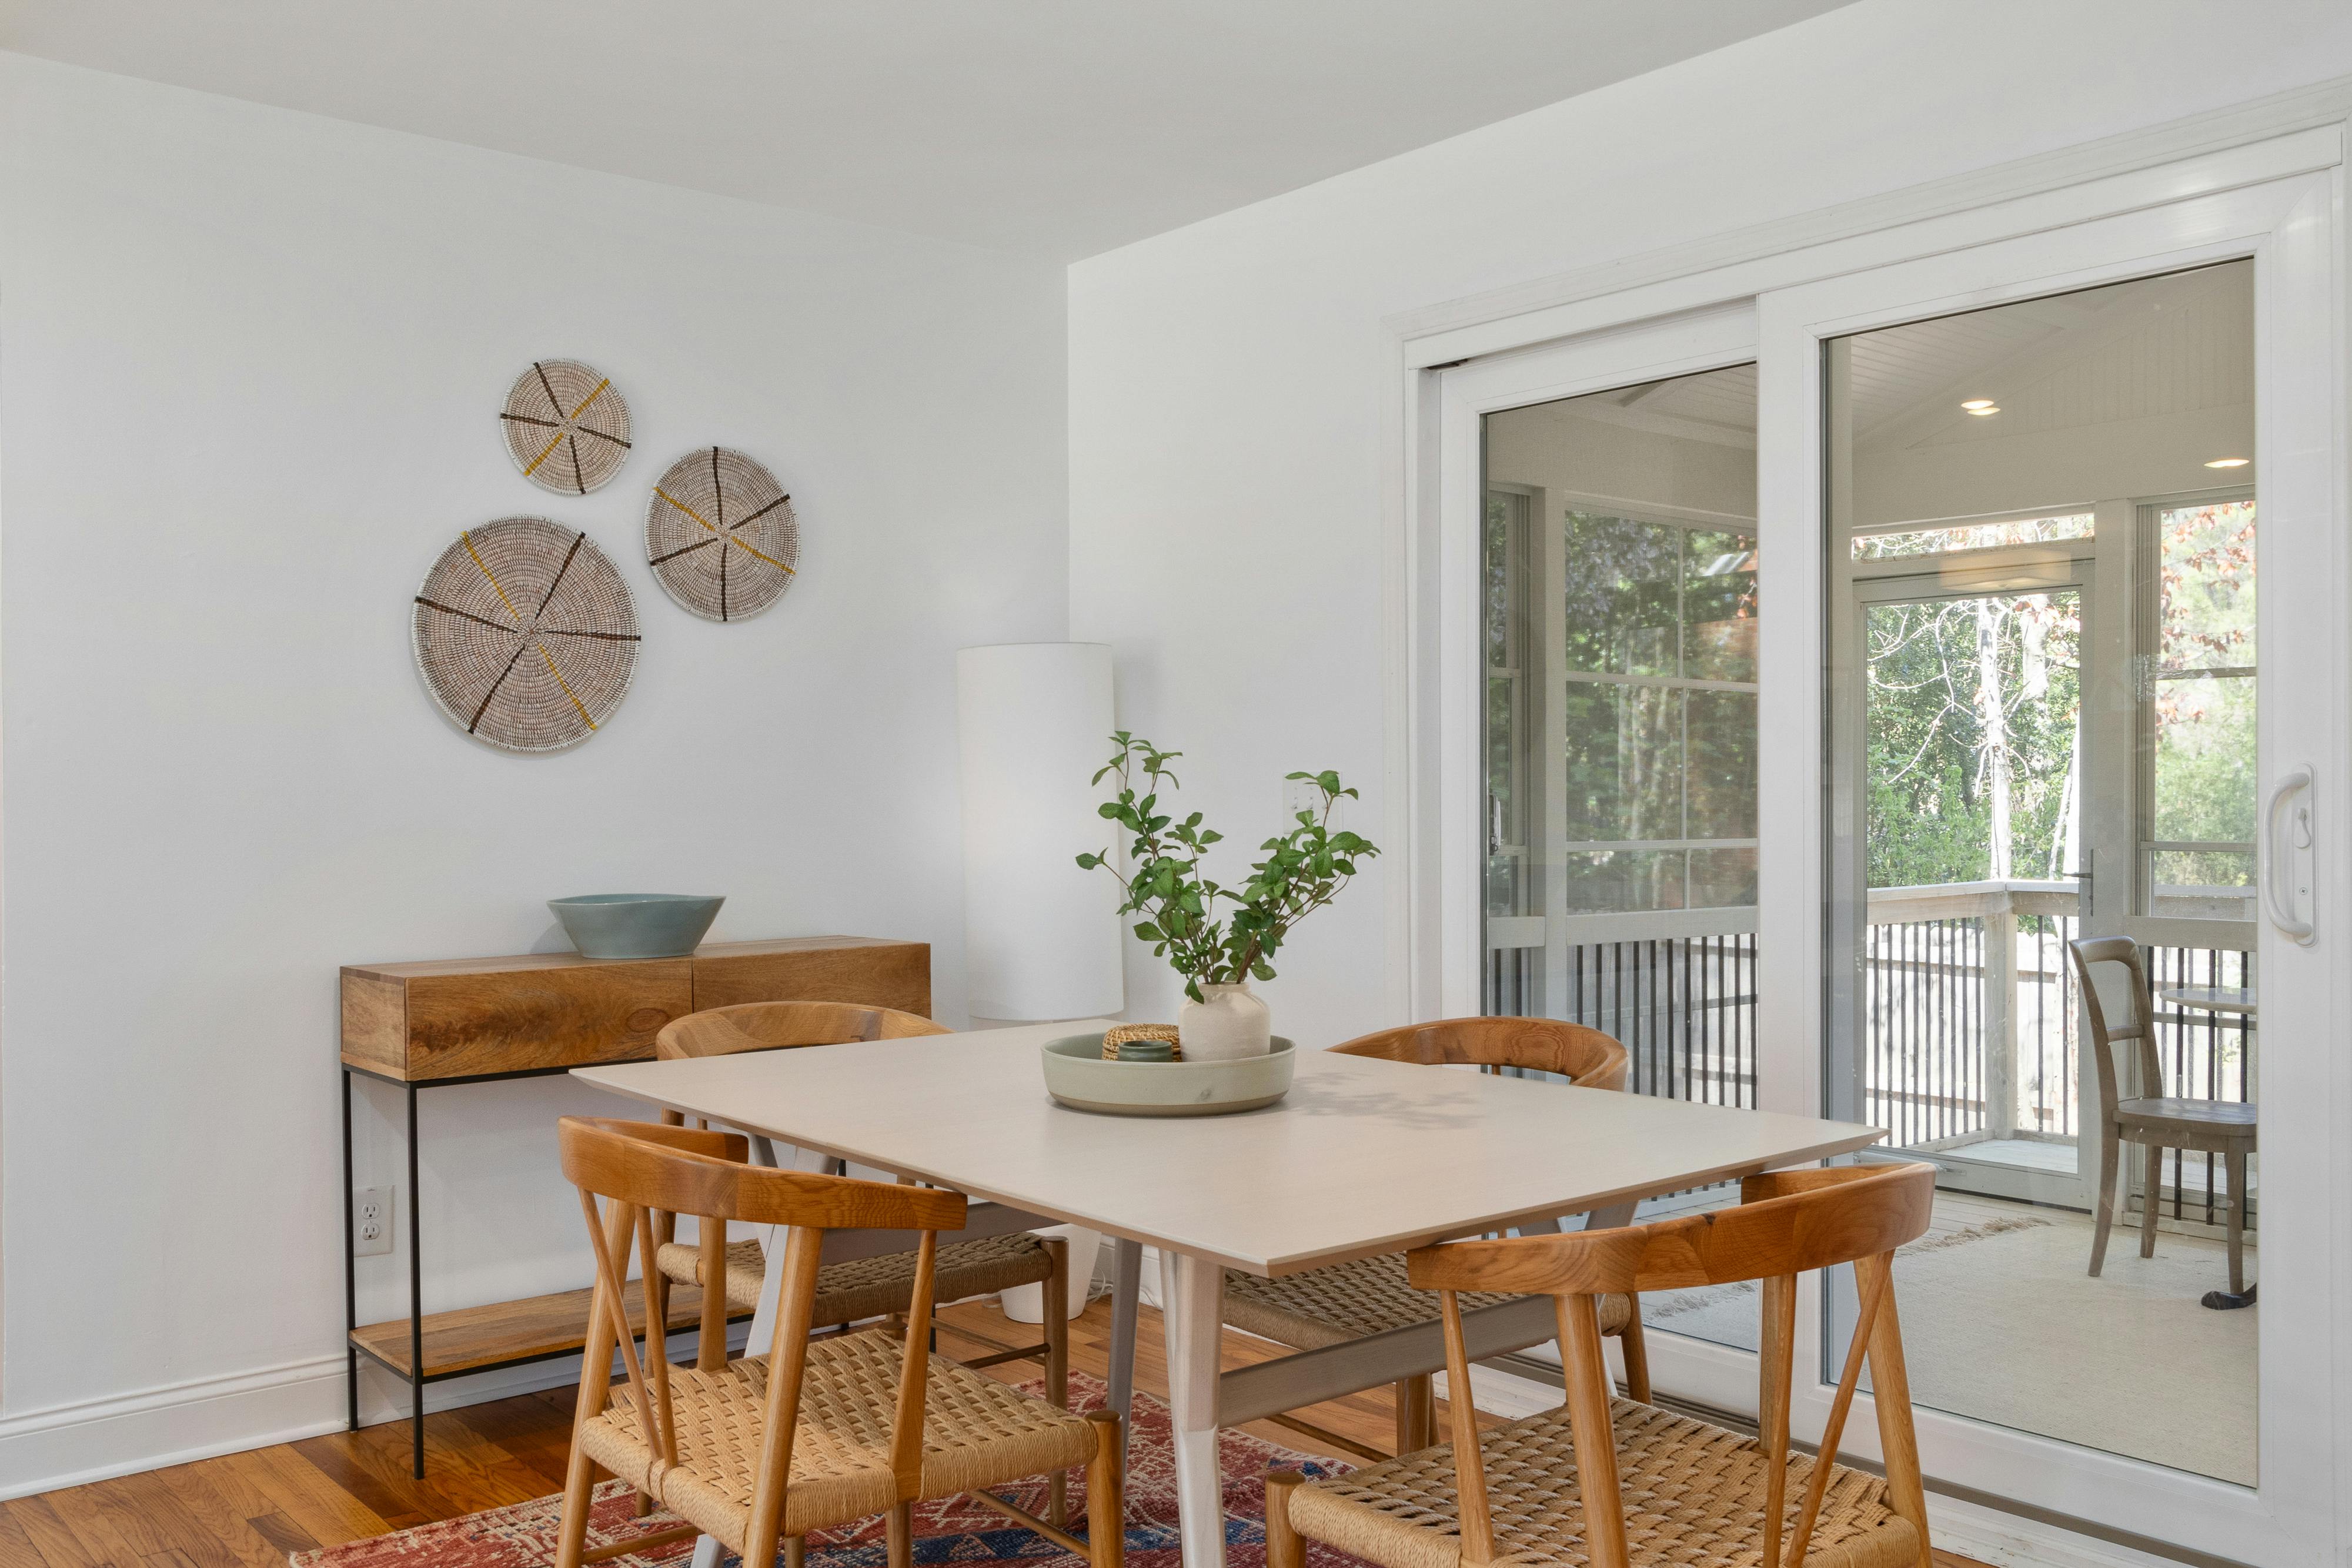
This separate dining example adds specific information: the table arrangement and glass doors beside it. In your own photo selection, a second view earns its place by showing something the first does not.
Check small details in the source files: sharpness, exposure, mirrors, visible personal information and features close to the edges. A narrow crop may remove the window you want to discuss. Keep the originals beside the project so you can compare the finished motion with the source.
VideoTour accepts up to 60 photos per tour. That is a limit, not a target. Use enough views to explain this property without making the same point repeatedly. Upload your intended selection before creating: adding new photos to an existing tour requires a paid plan.
Compare competing views before uploading. If two kitchen photos show the same cabinets, keep the one that makes the room easier to understand. Keep both only when the second reveals something useful, such as an adjoining dining area. Leave out an unrelated agency logo, a blurred duplicate or a decorative close-up that adds no property information. These are selection criteria, not a record of edits made to the demonstrations above.
Two useful ways to show a room
These published sample photos illustrate selection decisions. They are not a source pack for the complete-tour video above.
The wider living-room view shows seating, the fireplace and other visible areas in one frame. Choose a view like this when its job is to explain the room as a whole.
This separate dining example adds specific information: the table arrangement and glass doors beside it. In your own photo selection, a second view earns its place by showing something the first does not.
Check small details in the source files: sharpness, exposure, mirrors, visible personal information and features close to the edges. A narrow crop may remove the window you want to discuss. Keep the originals beside the project so you can compare the finished motion with the source.
VideoTour accepts up to 60 photos per tour. That is a limit, not a target. Use enough views to explain this property without making the same point repeatedly. Upload your intended selection before creating: adding new photos to an existing tour requires a paid plan.
Put the scenes in a useful order
Build a sequence around what the viewer needs to learn. Begin with context, move into the main living spaces, then cover the other rooms and features that deserve attention. Group related views instead of jumping repeatedly between indoors and outdoors.
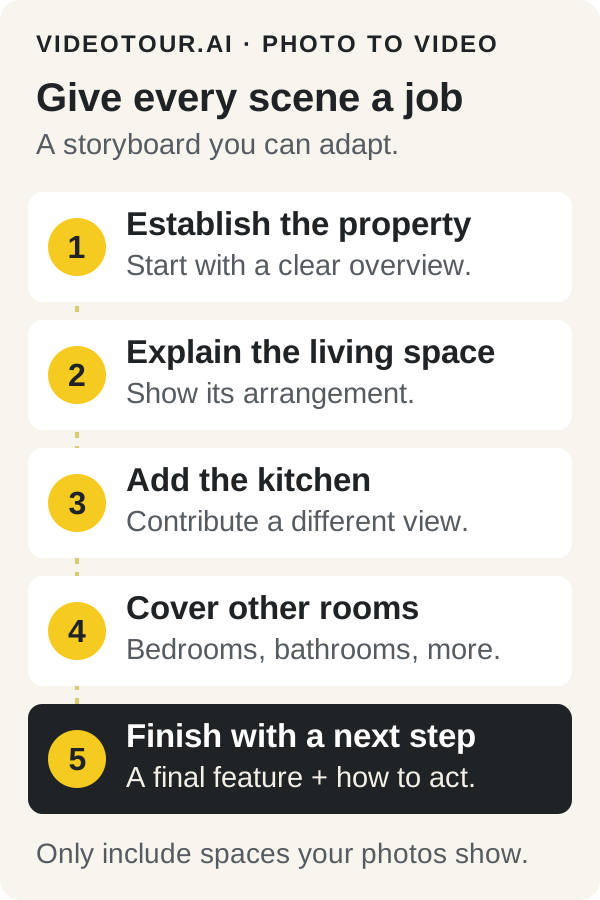
An editorial planning guide, not a floor plan or a reconstruction of the demonstration video.
Use this adaptable storyboard when planning your own listing. Include only spaces that exist and that your photographs actually show:
This is a planning sequence, not a claimed route through the demonstration properties. Disconnected stills cannot prove how rooms connect. For the wider production plan, plan your listing video with an approved fact sheet, scene/script pairs and a destination for each version. Use suitable filmed footage when you need to demonstrate a continuous route through the home.
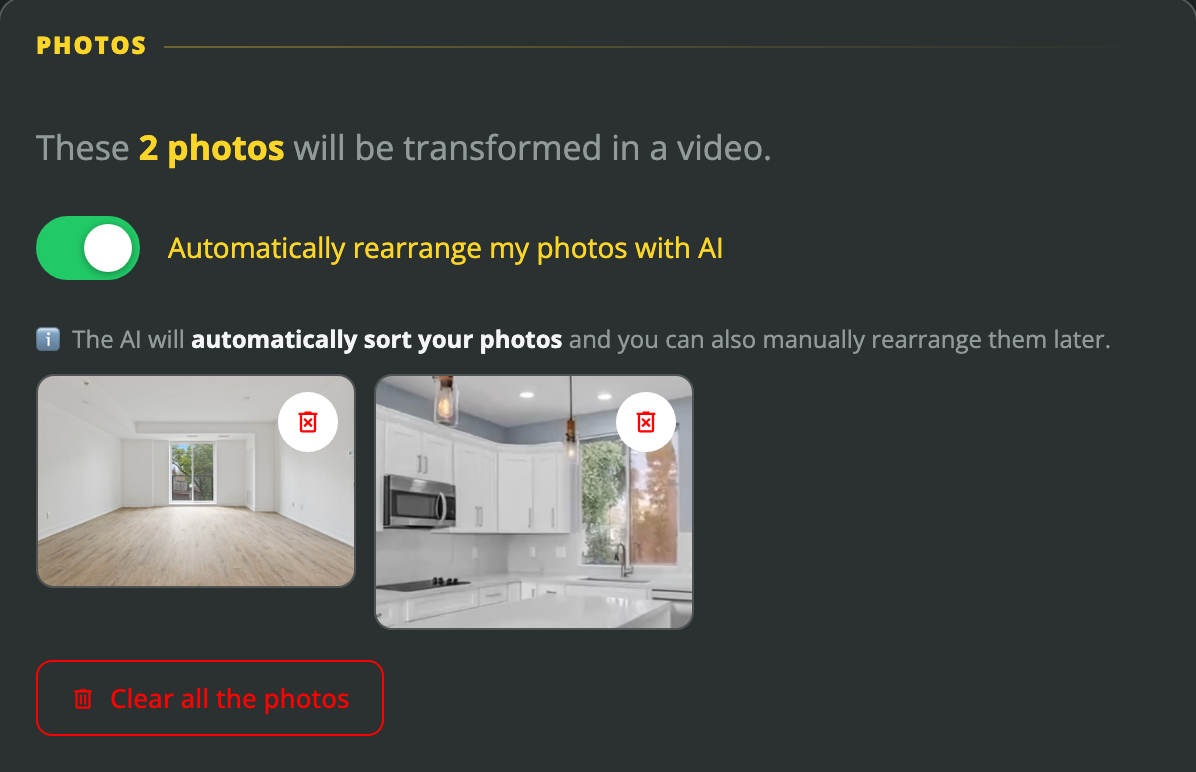
Current help-center example of the photo-review controls; these images are separate from the demonstrations above.
For a manually chosen order, turn off automatic rearrangement and filename sorting, use Reorder photos, then save the order. Review the resulting sequence again after generation.
An editorial planning guide, not a floor plan or a reconstruction of the demonstration video.
Use this adaptable storyboard when planning your own listing. Include only spaces that exist and that your photographs actually show:
- Establish the property: an exterior or another clear introductory view.
- Show the principal living space: the view that best explains its arrangement.
- Add the kitchen or connected area: show what this view contributes.
- Cover bedrooms and bathrooms: choose distinct, informative views.
- Finish the property story: a relevant garden, workspace or other feature, followed by a verified next step.
This is a planning sequence, not a claimed route through the demonstration properties. Disconnected stills cannot prove how rooms connect. For the wider production plan, plan your listing video with an approved fact sheet, scene/script pairs and a destination for each version. Use suitable filmed footage when you need to demonstrate a continuous route through the home.
Current help-center example of the photo-review controls; these images are separate from the demonstrations above.
For a manually chosen order, turn off automatic rearrangement and filename sorting, use Reorder photos, then save the order. Review the resulting sequence again after generation.
Add verified facts, captions and branding
Keep an approved fact sheet beside the photos. Check the full address, price, currency, floor area and units, bedroom and bathroom counts, and any rental period. A listing import or generated script is a starting point for review, not independent confirmation.
Match every caption to the image beneath it. “Kitchen” identifies a room; “newly renovated kitchen” makes an additional claim that needs support. A wide-angle photograph does not establish floor area, and a bright room does not prove a particular compass orientation. When a detail is uncertain, verify it or leave it out.
Keep the on-screen text short enough to read during its scene. If narration is enabled, listen for names, numbers and room descriptions that no longer match after reordering. Correct the text before making the final version.
Check the selected agent identity as carefully as the property facts: name, phone, email, website and logo. Choose branding for the intended destination. A social post and an unbranded listing submission may need different versions; removing one logo alone does not confirm that every destination requirement is satisfied.
Match every caption to the image beneath it. “Kitchen” identifies a room; “newly renovated kitchen” makes an additional claim that needs support. A wide-angle photograph does not establish floor area, and a bright room does not prove a particular compass orientation. When a detail is uncertain, verify it or leave it out.
Keep the on-screen text short enough to read during its scene. If narration is enabled, listen for names, numbers and room descriptions that no longer match after reordering. Correct the text before making the final version.
Check the selected agent identity as carefully as the property facts: name, phone, email, website and logo. Choose branding for the intended destination. A social post and an unbranded listing submission may need different versions; removing one logo alone does not confirm that every destination requirement is satisfied.
Choose the format, motion and audio
Choose where the video will appear before deciding its shape. VideoTour offers horizontal 16:9, vertical 9:16 and square 1:1. A wide website player, upright phone screen and square placement need different compositions. Use the current format and cropping guide for the controls.
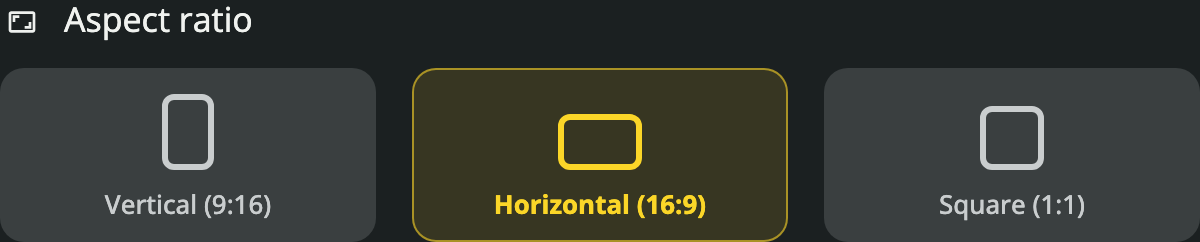
The current creation controls, with horizontal selected in this help-center example.
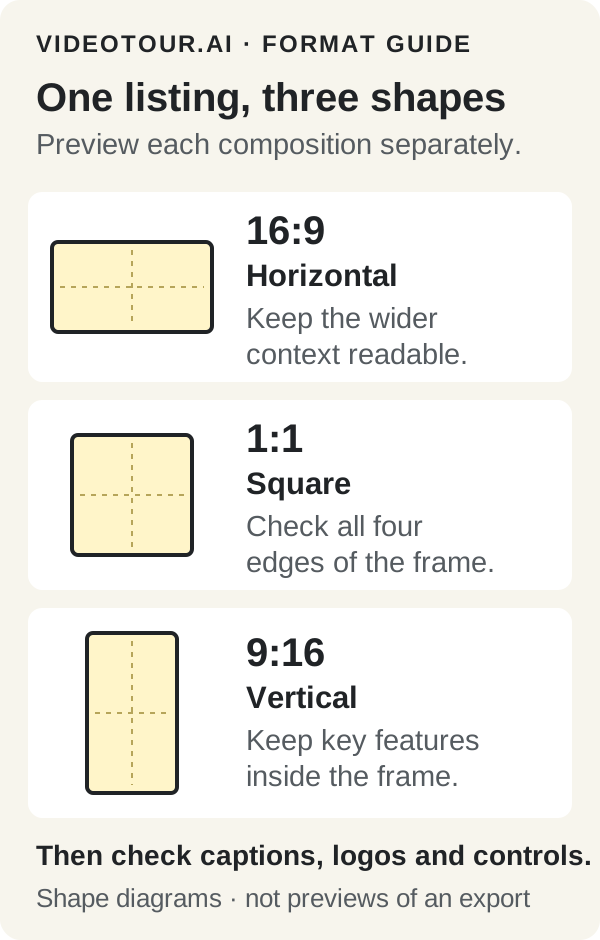
The frames show aspect ratios only. They do not simulate an automatic crop or guarantee acceptance by a publishing platform.
Inspect the entire image after changing shape. A vertical crop can hide a doorway or cut off one side of a kitchen. Check text and branding too, including where the destination’s playback controls may overlap them. Preview each version separately.
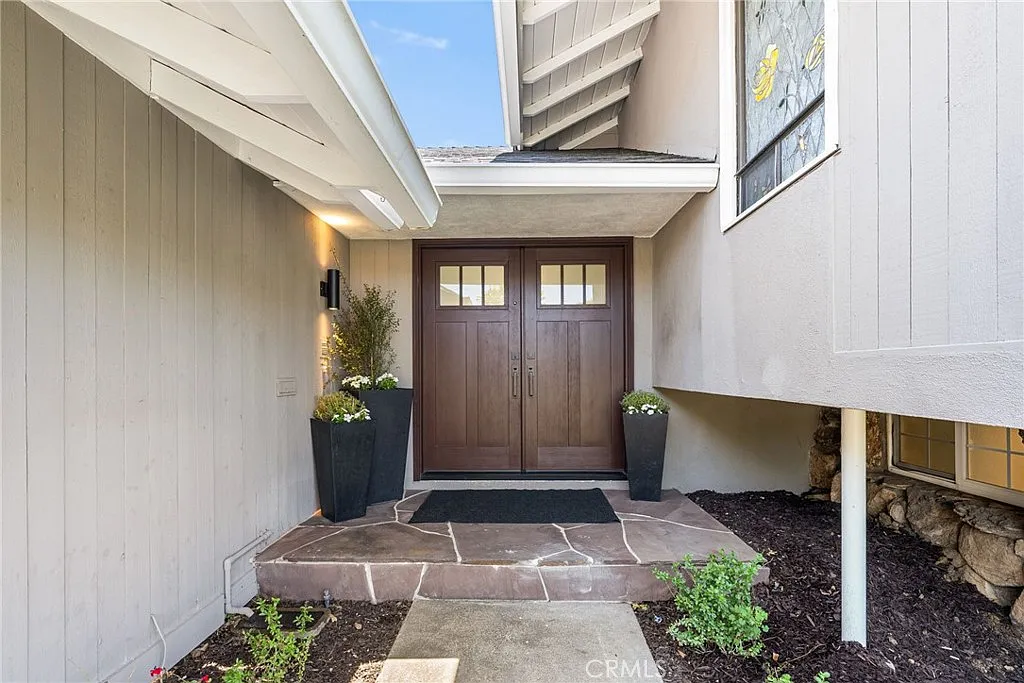
Framing exercise: the doorway is central, while roof edges and a window sit farther out. Preview a narrower version to see which details remain visible. This existing sample is not a simulated crop or an output from the tour above.
Simple pan-and-zoom presentation moves across a still image. AI motion can generate a changing view, which needs a closer fidelity check. Compare windows, doorways, walls, fixtures and proportions against the original. A dramatic move is not useful if it changes what the buyer thinks is there. Use restrained movement, or retain the still-image presentation when that communicates the property better.
Choose music you are authorized to use for the intended publication. Preview the soundtrack and, if you include narration, check that speech stays clear on phone speakers. Read every spoken property claim. No soundtrack should be treated as a guarantee against every platform restriction, and narration is optional.
The current creation controls, with horizontal selected in this help-center example.
The frames show aspect ratios only. They do not simulate an automatic crop or guarantee acceptance by a publishing platform.
Inspect the entire image after changing shape. A vertical crop can hide a doorway or cut off one side of a kitchen. Check text and branding too, including where the destination’s playback controls may overlap them. Preview each version separately.
Framing exercise: the doorway is central, while roof edges and a window sit farther out. Preview a narrower version to see which details remain visible. This existing sample is not a simulated crop or an output from the tour above.
Simple pan-and-zoom presentation moves across a still image. AI motion can generate a changing view, which needs a closer fidelity check. Compare windows, doorways, walls, fixtures and proportions against the original. A dramatic move is not useful if it changes what the buyer thinks is there. Use restrained movement, or retain the still-image presentation when that communicates the property better.
Choose music you are authorized to use for the intended publication. Preview the soundtrack and, if you include narration, check that speech stays clear on phone speakers. Read every spoken property claim. No soundtrack should be treated as a guarantee against every platform restriction, and narration is optional.
Build the video and review the result
Once the photos and facts are ready, work through the current first-video setup guide. It covers exact controls; the decisions below keep the project focused.
Keep a short correction list with the scene and issue, such as a caption obscuring a fixture or a room appearing too early. These are things to look for, not reported defects in the demonstration. Fix the order first, then check captions and narration against the revised sequence. Finally review framing, branding and audio balance.
Use the editor’s Apply the changes action when the revised video is ready to render. After it finishes, watch the new output and download that version. Open the downloaded file outside the editor: confirm it plays from beginning to end, the sound is right and the intended shape is preserved. A working preview is not a substitute for checking the file you will publish.
This workflow concerns a photo-based property tour. VideoTour’s separate Walkthrough Tour and AI Reel options have their own requirements; you do not need to add them to complete this task.
- Start the project. Open Create a video, choose Real Estate and check the listing goal. Upload your photos or import an individual property’s supported listing URL. Wait for the images to finish loading.
- Review the inputs. Check the complete photo selection, chosen order, property information and agent identity. Remove unrelated material before creating.
- Set the presentation. Choose the format, captions, optional narration and soundtrack. Review which photos receive AI animation. Add effects only when they serve the listing.
- Read the usage summary. A new tour uses video allowance, and optional AI work can use AI credits. Check the displayed total after changing settings; do not assume every effect or additional output is included.
- Generate once, then watch the complete result. Judge the sequence and overall pacing before polishing individual details.
Keep a short correction list with the scene and issue, such as a caption obscuring a fixture or a room appearing too early. These are things to look for, not reported defects in the demonstration. Fix the order first, then check captions and narration against the revised sequence. Finally review framing, branding and audio balance.
Use the editor’s Apply the changes action when the revised video is ready to render. After it finishes, watch the new output and download that version. Open the downloaded file outside the editor: confirm it plays from beginning to end, the sound is right and the intended shape is preserved. A working preview is not a substitute for checking the file you will publish.
This workflow concerns a photo-based property tour. VideoTour’s separate Walkthrough Tour and AI Reel options have their own requirements; you do not need to add them to complete this task.
Check these details before publishing
Keep the original photos and fact sheet open during the final review:
Use the guide to commercial use, watermarks and MLS branding for product controls. An unbranded export is a preparation choice, not a blanket promise of MLS acceptance. Keep the source photographs and a record of any material changes available for your publication review.
- Property fidelity: the rooms, fixed features and visible setting still match the sources; generated movement has not introduced misleading details.
- Sequence and timing: the opening gives context, repeated views earn their place and captions stay visible long enough to read.
- Facts and words: address, price, units, room labels, narration and contact details are correct.
- Framing: important features, captions and logos remain visible in every exported shape, including on a phone.
- Audio and playback: the soundtrack is authorized, narration is audible and the downloaded file plays through.
- Destination: check the current branding, content and disclosure requirements of the brokerage, listing service or platform where this version will appear.
Use the guide to commercial use, watermarks and MLS branding for product controls. An unbranded export is a preparation choice, not a blanket promise of MLS acceptance. Keep the source photographs and a record of any material changes available for your publication review.
Questions about making real-estate videos from photos
How many photos do I need?
Use enough to explain the property without repeating views. There is no single ideal count for every listing. VideoTour’s current upload limit is 60 photos; start with the images that add useful information, not an arbitrary target.
Do I need AI to turn photos into a video?
No. A slideshow can combine stills, text, music and simple movement. AI can add generated motion, but the result still needs a property-fidelity check. Choose the presentation that fits the listing and the review time you have.
Is this the same as a filmed walkthrough?
No. A photo-based video presents selected still images and any generated movement. It does not establish a continuous physical route through the home. Use recorded footage when actual movement between spaces is part of what you need to show.
Can I add music and narration?
Yes. The photo-based VideoTour workflow includes background music and optional narration. Check the soundtrack’s permitted use, verify spoken facts and preview the voice/music balance before publishing.
Which photo-to-video app should I choose?
Compare supported inputs, editing and motion controls, export options and the cost of the finished version you need. Our comparison of apps that make videos from photos covers tool selection. Once you have chosen, use this guide for the production decisions.
Conclusion
Have your listing photos ready? Create a real-estate video from photos with VideoTour.ai, then follow the setup guide to build your project. Keep the original photographs and verified listing details beside you for the final review, and publish the version that fits your chosen destination.